At first glance, the design of a catamaran seems simple: two inflatable floats and a frame between them. However, the few basic elements come with a host of specific nuances, knowledge of which is essential for anyone passionate about catamaran rafting. With the right information, it’s easier to choose the right watercraft for your needs, upgrade an existing model, or repair it in the field.
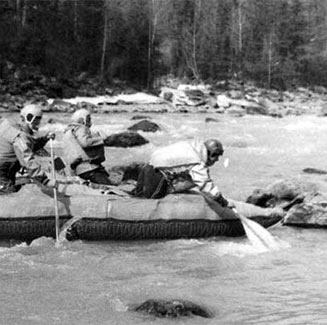
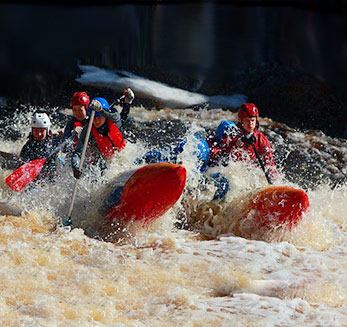
 Ready for rafting
The vessels grouped under the general name “catamaran” are initially designed for tasks of varying complexity, ranging from leisure rafting to conquering rivers of the highest, 6th difficulty category ( a list of the best challenging and not-so-challenging rivers for rafting is provided ). Each manufacturer approaches the issues of comfort and safety differently, reflected in the designs of frames, floats, and seats.
Understanding all the existing nuances and characteristics by reading just the manual that comes with the vessel is virtually impossible. I’ll attempt to explore the topic of tourist catamaran construction in this article.
Float Design
The floats are the most critical part of the vessel. They determine stability, buoyancy, and performance. There are two primary types of floats: single-layer and double-layered.
As their names indicate, the distinction lies in the number of material layers forming each float—either a single airtight container without an inner chamber or a double-layer construction where the outer load-bearing shell protects the inflatable chamber.
Both types come with advantages and disadvantages and are surrounded by myths often perpetuated by manufacturers.
Single-layer Floats
They are lighter, more compact, and faster to assemble. When made from high-quality boat-grade PVC material, they’re just as reliable as double-layered floats. Adhesive seams enhance connection points during manufacturing, and in case of emergency repairs, specialized patches do the job excellently. Repairing single-layer floats in the field is simpler.
Single-layer floats are also divided into internal compartments, so damaging one won’t sink the vessel. High-quality materials for single-layer hulls include German fabrics such as VALMEX Boat Mainstream 1000 g/m² and Powerstream 1200 g/m², as well as HEYTex Boat H5559 1200 g/m².
 Valmex Boat Mehler fabric for hulls. Valmex 1200 grams
The downside of single-layer models is that the proper material required for their construction is more expensive than what is needed for double-layer floats, making mass production less cost-effective.
Double-layer Floats
Double-layer floats feature an internal inflatable layer encased within an outer load-bearing shell. These floats are heavier when dry, and after rafting, water trapped between the layers adds more weight. They are also harder to properly dry and assemble, with the process potentially taking several hours. Additionally, they occupy more storage space. Contrary to popular belief, they are no less susceptible to punctures than single-layer floats.
The internal chamber is made from lightweight, medium-strength material that somewhat mirrors the shape of the outer float shell to avoid unnecessary creases. The chamber extends slightly beyond the outer float, allowing it to inflate without over-pressurizing and reducing stress on the seams. Top-quality fabrics for such floats include Finnish Viniplan 6331 boat 550 g/m² and VALMEX Boat Life raft 7326 500 g/m².
 MEHLER PLASTEL® boat TE 70 repair kit
For repairs, PVC materials like PLASTEL boat TE 90 and TE 70 have proven to be reliable, showing excellent adhesion and a tear strength of 2800/2800N for a 5 cm strip. Adhesive choice is crucial; manufacturing typically uses two-component adhesives, with the French BOSTIK being one of the better compromise options.
Float Shapes
The floats of early catamarans had a simple cigar-like shape. These are easy to sew, and if volume needs to be increased, the design can be modified without complex calculations.
Catamarans with such floats are convenient platforms for attaching decks and mounting equipment for motors or sails, making “sausage-shaped” catamarans the best choice for tourists not seeking extreme conditions.
 Camel-type floats
Sport-oriented two-person models are designed in the “camel” style. They earned this nickname due to the “humps” at the bow and stern. Meanwhile, the middle section, where rowers and luggage are positioned, is lowered. This lowers the center of gravity, making the vessel more stable and maneuverable. Additionally, the humps partially shield paddlers from impact with oncoming waves.
Number of Compartments
The internal capacity is often equipped with partitions, dividing it into several independent sections. This increases the weight of the catamaran, and during assembly, each section will have to be inflated separately. However, even if the vessel gets a puncture, there will still be a considerable reserve of air in the tube, allowing the rowers enough time to maneuver the vessel to the shore.
Volume
An important characteristic that determines the ship’s load capacity and its ability to overcome obstacles. A large float easily navigates moderately challenging rollers, and with the crew’s skilled work, even dangerous foamy kettles. It is not flipped over by steep waves; in general, in such situations, this type of catamaran demonstrates exceptional stability.
 Load capacity of catamarans based on gondola volume. Maximum load for Urex Tourist-1: 350 kg, for Bereg K6: 1700 kg.
The larger the volume of the tubes, the less maneuverable the vessel becomes. Thus, in slalom sections, a heavy catamaran will feel much less confident.
Additional Features
- Inflation valve designs may vary. For example, self-sealing valves (models by “Raftmaster”), zippers (“Baseg”), or piano hinges (“Svarog”).
- Cross-bar mounts. Some vessels have a laced frame, with special ridges and eyelets along the sides of the tubes to thread a rope through. This type of attachment has a downside—the rope can easily be severed, for instance, by hitting a rock. As a result, many manufacturers offer an alternative method: a corridor along the tube, though this solution often only works for the original frame. Hence, replacing a damaged tube with, say, a wooden bar can be problematic. Some manufacturers address this by combining both attachment methods: corridor and ridges.
- Pockets and handles. For the convenience of the crew, the tubes may have separate pockets for a rescue line, pump, or repair kit, as well as special handles for lifting the vessel or for holding on when in the water.
- Custom tailoring. Manufacturers offer standard serial models, but many are willing to make modifications at the customer’s request. For example, if the inflatable container lacks internal partitions, you can ask to have them added or choose a denser material for the bottom. Some might want to enlarge the overlays, reinforce the seams, or add handles. Such improvements allow for a custom-built watercraft tailored to personal needs.
Frame
An equally important element, as it determines the overall strength of the structure. A catamaran’s frame must be lightweight, reliable, and durable to withstand impacts—qualities achieved using various methods. Let’s begin with the right frame material.
Material
Duralumin is used more frequently than other alloys. Tubes made of D16T, in particular, are highly recommended as they offer an optimal balance of strength and weight. Titanium frames are also occasionally seen but are quite brittle and are generally an exception.
Wood. For extreme circumstances where extensive portaging via foot is required, many adventurers prefer to construct the frame on-site. Naturally, this is only feasible in areas where suitable young trees can be found.
 Wooden frame for a catamaran
Building with wood requires more time than assembling a factory-made frame but allows for significant savings in the weight of transportable equipment. The finished wooden structure is strong and relatively light, making it perfectly capable of handling any obstacles within the crew’s abilities. Wood also often saves the day for those who’ve experienced some form of breakage, as there are usually no alternative materials available for frame repair on the river.
Shape and Length
- Standard frame – consists of straight tube segments joined together. The longitudinal beams attach at the sides of the pontoons and are connected by crossbars. Some “camelback” models even have a special tension tube beneath the seat, leveling the area under the rower’s knees. Its ends are clamped beneath the crossbars.
- Curved tubes. Certain catamaran models, such as the “Argut” from Triton, feature curved tubes. This design helps form the pontoon and enhances structural rigidity but has several disadvantages. One of these is the difficulty of repairing the frame while in the field.
- Long longitudinal beams are available in two configurations: straight or curved tubes. They increase the rigidity of the pontoons, allowing the catamaran to hold its course better and cut through waves. However, when submerging into a roller from a steep spillway, rigid noses tend to dive deeply, and water can push the catamaran into a bow-stand position. Conversely, a rigid stern meeting a current’s flow distributes the force throughout the frame, potentially resulting in a stern-stand situation.
- Short longitudinal beams are typically straight only. The nose and stern of such catamarans are soft, enabling the noses to “resurface” in rollers, preventing capsizing or flipping. However, with the stern submerged under the current, it is slightly pulled down and then pushed back out. The trade-off for stability in rollers is reduced maneuverability.
Frame Assembly Methods
Rigid Bolt Connection. Crossbars and longitudinal beams are fastened with bolts, resulting in a rigid frame. This makes the catamaran very responsive to the crew’s actions; however, such a frame is less resistant to deforming loads.
Other drawbacks of this type of connection include the possibility of bolts bending, which complicates assembly and disassembly, and bolts occasionally getting lost. Therefore, it’s wise to include a few extra lashings in the repair kit for a rigid-frame catamaran, just in case.
 Frame assembly methods: bolt and lashing
Flexible Lashing Connection. A frame with lashings is easier to assemble. Here, elastic bands with aluminum windlasses are used as connecting elements and are secured with cuffs. Another option involves ordinary rubber strips cut from old car tires. There have even been cases of bamboo frames held together with nothing but duct tape.
Frames using lashings are more flexible, forgiving significant deformations and absorbing impact energy. However, a craft with this type of frame responds to rowing actions with a slight delay.
Solid and Collapsible Crossbars
Longitudinal beams are lengthy and therefore divided into two halves. This does not affect the frame’s strength since significant stress does not occur at the joints. However, the situation is more complex with crossbars, which experience various types of loads.
Solid pipes are more reliable than collapsible ones, but powerful water flows can break almost anything, making convenience important.
Collapsible crossbars emerged for increased convenience and to comply with stricter baggage transportation rules. Many adventurers have opted for collapsible designs — the compact bundle with paddles and the frame easily fits on a third luggage shelf. This option complicates assembly, and there’s a risk of shearing bolts on water-obstructing rocks.
Overall, such constructions are gaining popularity, and water routes increasingly feature vessels with collapsible crossbars. Some enthusiasts even decided to shift the joint location closer to the pontoons, where the load on the frame is less.
Seats
Ideally, the number of seats equals the number of rowers and is divisible by two, as the crew is evenly distributed across both pontoons. However, variations exist: on the “Latvian” tandem, seats are located between the gondolas.
During leisurely rafting trips, passengers can sit on backpacks. On challenging routes, the rower’s seating must ensure safety and comfort. Seats are thus pre-attached to the outer fabric or securely fixed in position.
Numbness in knees during a kneeling position is an unresolved issue for catamaran rafting. On calm stretches, rowers can stretch out their legs for relief, but sometimes it’s hard to even disembark.
Every catamaran enthusiast defines comfort differently, but one thing is universally acknowledged — the seat should be high enough to reduce strain on the knees.
On sports catamarans, two types of seats are prevalent: “rifle mounts” and more familiar inflatable seats:
- “Rifle mounts” received their peculiar name due to the support resembling a machine-gun bipod. This structure is quite comfortable and won’t deflate unexpectedly, but its use is rare and it remains an exotic option.
- Inflatable seats, or benches, are more common. They are easier to assemble, comfortable, and have only one drawback — if the plug accidentally pops out, the seat will deflate. However, this is rare, and in all other aspects, this type of seat performs excellently.
 Inflatable seat or bench
Knee supports are mandatory for solid seating arrangements. They securely hold the rower in place, preventing falls and enabling effective rowing. One end fastens to the longitudinal beams, and they are adjustable to suit each individual’s needs and build.
Some “Belraft” catamarans even include two straps on each side. However, this level of convenience is truly appreciated mainly by individuals taller than average.
Support straps can secure the leg in different positions. Some prefer straps placed as close to the body as possible, while others favor support in the middle of the thigh. These preferences vary among individuals, and each athlete adjusts the straps to their liking, especially since catamaran manufacturers typically provide this flexibility.
 Rowers in a kneeling position on a gondola
An additional feature on supports is a quick-release buckle, as found in “Raftmaster” models. This is essential for quick escape in case of capsizing if the straps get caught on protective gear or other equipment.
Additional Features
Decks or tarps are common in most flat-water and heavyweight models; I’ve even seen tents installed on decks. Waterproof bags for luggage are also essential.
 Tent on a catamaran
The ability to install a sail and a removable motor transom is another nice-to-have feature. In short, there’s no limit to improvement, and as long as catamarans exist, their designs will continue to evolve. Creating a universal vessel suitable for all types of rafting is hardly possible, but existing models have every chance to become better.