 Travelers had a tough time in ancient days! To determine direction, they oriented themselves by the sun during the day and by the stars at night. But what do you do if the entire sky is covered with clouds, and such weather lasts for several days? There are methods for determining cardinal directions using trees, moss, and numerous other signs, but their accuracy is very low.
Nowadays, there’s no need to rely on such methods because humanity has invented a wonderful gift for anyone setting out on a long journey—a compass. It is unclear who or when someone noticed that a magnetized piece of metal, suspended on a thread, always aligns itself in the same position: one end pointing north and the other south. This simple device became the ancestor of modern orientation tools.
What Does a Compass Look Like and What Are Its Components?
 The simplest compass consists of a magnetic needle that rotates freely on an axis. Have you ever brought two magnets close to each other? They repel on one side and attract on the other. That’s exactly how a compass works. The magnetized needle acts as one magnet, and Earth itself acts as the other! As a result, the compass needle always points to the North. There’s also a liquid-filled compass that works the same way, except the needle floats in a liquid rather than resting on an axis. The viscous liquid prevents the needle from constantly wobbling if you’re trying to use the compass in shaky conditions (like while moving in a vehicle).
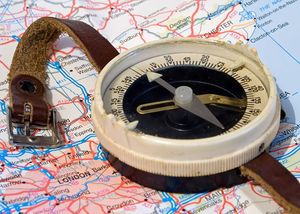
With a compass, one can determine the orientation of cardinal directions, but that is clearly not enough for traveling in other directions. Therefore, in addition to the needle, the device includes other components. The compass sits in a round plastic housing with a transparent top through which a dial with gradations is visible. Some compasses have a protective lid to shield the delicate glass. In hiking situations, it can be hard to locate such a small but crucial tool in a large backpack, so designers have considered travelers and added a strap for wearing it on your wrist. On the side, you may notice a small metal plate—it’s a brake that locks the needle in place. The movable top section features a sighting mechanism with two projections: one with a notch and the other with a bead.
Going on a journey? Knowing what camping is is a must for any traveler.
On this page , you’ll learn the difference between longboards and skateboards and how to choose what suits you best.
Understanding Compass Markings
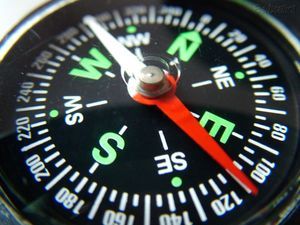
The letters on the compass indicate cardinal directions. Take a closer look at the dial: the starting point, the direction of north, is usually marked by the letter ‘С’ (North in Russian). Then, moving clockwise in even intervals, the letters ‘В’, ‘Ю’, and ‘З’ mark East, South, and West. Some compasses label the cardinal directions with English letters: N, S, E, W—these stand for cardinal directions in English:
- North - North
- South - South
- East - East
- West - West
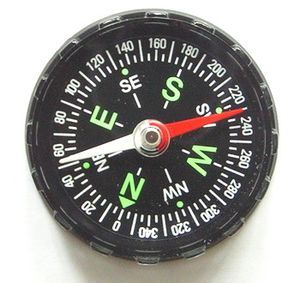 As known from geometry, a circle is divided into 360°, so there are 90° between each cardinal direction. If we marked every degree with a corresponding number visible to the naked eye, the compass would be too large. Instead, the scale is marked with lines at 5° intervals, and only values divisible by 20 are labeled.
At the center of the dial is a rotating needle, with two halves colored blue and red. The red needle points to the South, while the blue one points to the North. Many people mix this up, but it’s easy to remember: South, where it’s warm, is marked with the “hot” red color, and North, which is colder, is marked with the blue color. In most devices, the needle, as well as the key points on the dial, are coated with phosphorescent materials so they glow in the dark.
This describes a standard compass, but manufacturers have been innovating a lot recently. To determine exactly which end of the needle points North and where the starting point on your compass is, always read the instructions.
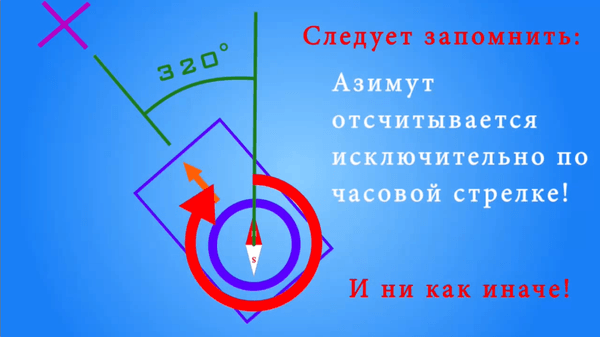
Azimuth is the Angle Relative to True North
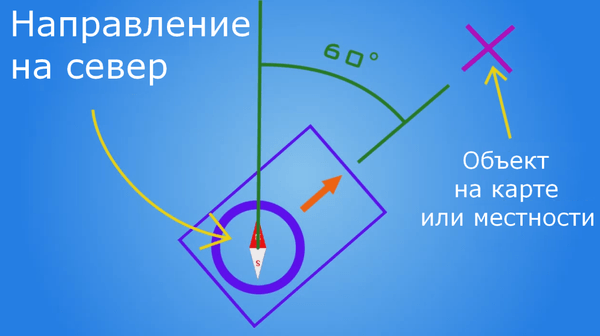 Situations where you need to go strictly south or north are very rare. Therefore, before embarking on a hike, it is necessary to learn how to navigate using a compass in any direction. To help with this, we have azimuths. To understand what this is, take a map and mark two points on it: one representing your current location and the other representing your destination. Connect these points with a straight line, and from your location, draw a ray pointing directly north. The angle between these two lines will be called the azimuth. Knowing this, you can reach places where the road is otherwise unknown to you.
You can learn about the climate and weather in Dombay in our article.
Interested in mountaineering but don’t know where to begin? Start with our article on how to tie the basic mountaineering knots.
Perhaps you’ll like our selection of the five best aviation movies .
Navigating the Terrain with a Compass
Now let’s move to a practical matter—using a compass in the field. Let’s say you’ve found an interesting geographical feature on the map and want to get there. First, you need to determine the azimuth.
Identify your position on the map.
Draw a vertical line upward from this point—this is the direction to the north.
Place the compass on the map so its center rests on your current location and the letter N (or С in Russian) aligns with the drawn line.
Rotate the map until the compass needle aligns with the northern direction (don’t forget to release the brake).
Looking through the slit on the sight, turn the top part of the compass until the desired object falls into the “crosshairs.”
Check what value the indicator needle points to. If it falls between two numbers, use the smaller one and count the number of divisions between it and the needle. As each division corresponds to 5°, multiply the count by five and add it to the value you read on the compass dial.
 Now you can record the azimuth you’ve determined and put the map in your backpack. There’s no need to keep it in front of you the entire time. Your direction will be guided by the compass.
Set the compass on a stable surface. If there are no suitable rocks, stumps, or similar objects nearby, use a backpack placed on the ground. You can also determine the azimuth while holding the compass, although this adds extra challenges.
Release the brake and align the compass needle’s blue end with the letter N (or С).
Set the indicator to the azimuth value.
Peer through the slit on the sight and choose a landmark.
You can begin your journey. Upon reaching the landmark, take out the compass again and determine the next one. Continue this process until you reach your destination.
Is it possible to learn parkour at home ? What is parkour really about, and what does it take to become a true traceur? Read all about it in our article.
If you enjoy outdoor leisure, don’t miss our guide to camping.
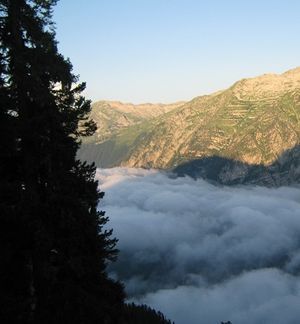 Knowing how to determine the azimuth can also be useful even when hiking a familiar route without a map. Imagine you are high in the mountains and decide to explore a nearby peak. You travel light, as you expect to return in a few hours, but clouds suddenly roll in and obscure the valley between the peaks. You don’t know when the weather will clear—it could remain like this for days. What should you do? Though the mountain where your camp is located is visible from above, how can you navigate the fog-filled valley? Don’t worry—if you’re confident there are no dangerous cliffs or chasms along the way, your trusty compass will lead you back.
Position the compass so the blue end of the needle points to N (or С).
Rotate the top portion of the compass so that the sight aligns with your campsite.
Record the azimuth value in case the indicator gets misaligned.
In the fog, hold the compass in front of you, ensuring the needle’s north end matches N, and proceed in the indicated direction.
This method is not perfect, and it’s best to avoid such situations if possible. However, it can be used in a pinch. If the distance isn’t too great, you won’t miss the mountain, yet without a compass, you could wander aimlessly or stray far off course.
If anything remains unclear, or if you’d like to reinforce your understanding, watch this video on how to use a compass: https://www.youtube.com/watch?v=1G-X-RmhhA4